Caramel-Chocolate Apple Dipping Tutorial
I was lucky enough to attend a Chocolate-Caramel Apple class about a year ago. It was taught by a professional, named Lisa, who makes and sells these for a living! She was EXCELLENT and had so many great tips. Hopefully I'll be able to teach you as much as she taught me.
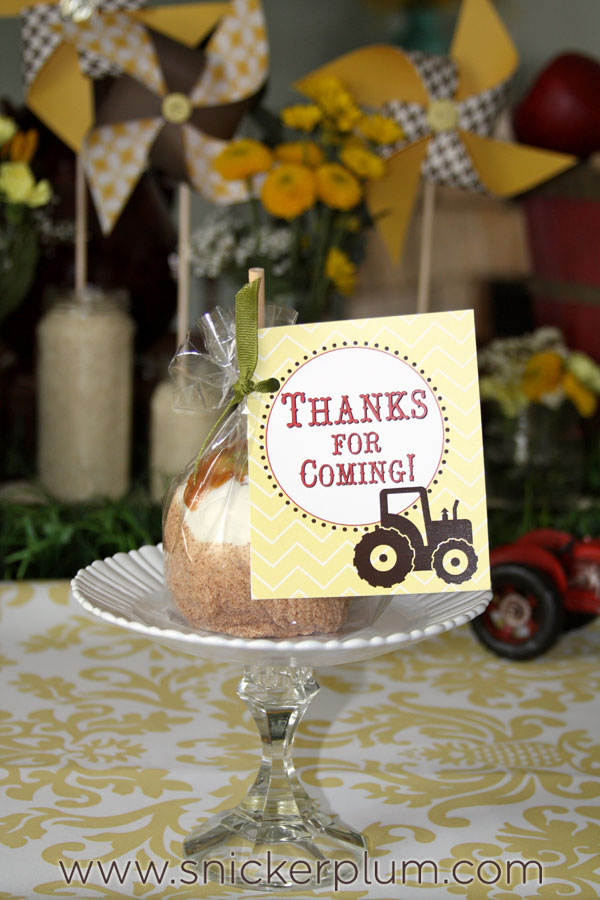
When I was planning my Chic Farm Twin Baby Shower I was thinking of giving the guests an apple for a thank you, maybe even some caramel sauce to go with it. But, then it hit me that I could just make a Chocolate-Caramel Apple for them instead! I had, afterall, taken a class, but just never tried it on my own... It would either be a great sucess, or no one would ever know I tried :) Thankfully, I'm here to say, it worked out great! The hardest thing was trying to take my own pictures of me doing it. It's very tricky pretending you're left handed!
In my class, I learned the the materials you use will make or break how everything turns out and the taste. Lisa preferred Peter's Caramel and Merckens or Guittard Chocolate. So, I just went ahead and used her recommendations. (I used Guittard Chocolate) I got my caramel, chocolate and these awesome sticks at Gygi, a great culinary store here in Utah. Those without one, I'm so sorry! It's amazing! Lisa also recommended using Fuji or Gala for the apples, or Granny Smith if you like a little sour bite with all the sweet. You will also need some wax paper and toppings...
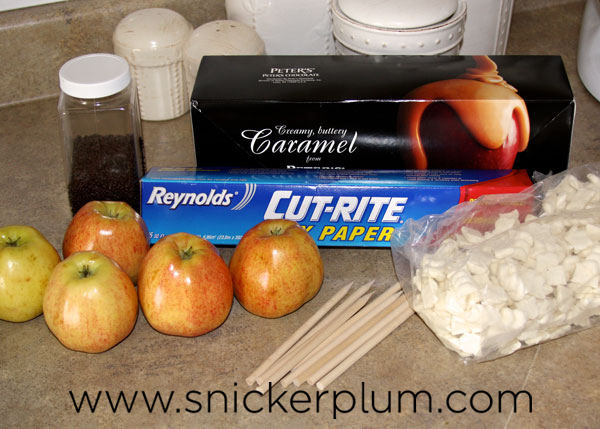
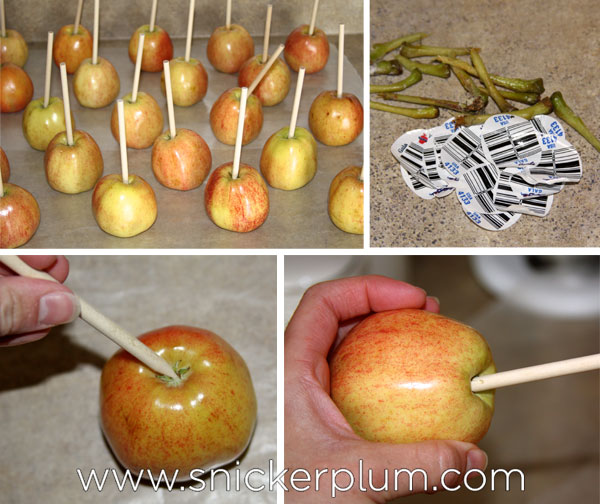
After washing your apples, removing your stems and stickers, you will attach your wooden stick by pushing it into the center of the apple. Push it into the bottom of the apple, so that your apple won't be top heavy, since the top is wider than the bottom. Make sure your apples have dried thoroughly before continuing on.
Melting Caramel:
Caramel will get very hot during the melting process, but be careful not to bring it to a boil, as the sugar will start to turn grainy. We used a glass pyrex bowl and a microwave.
1. Heat on high power for 1-1.5 min. initially. Stir (it will still be very thick at this point)
2. Continue to heat at 1 minute intervals, stirring after each interval
3. Repeating as many times as necessary, until it reaches the desired consistency
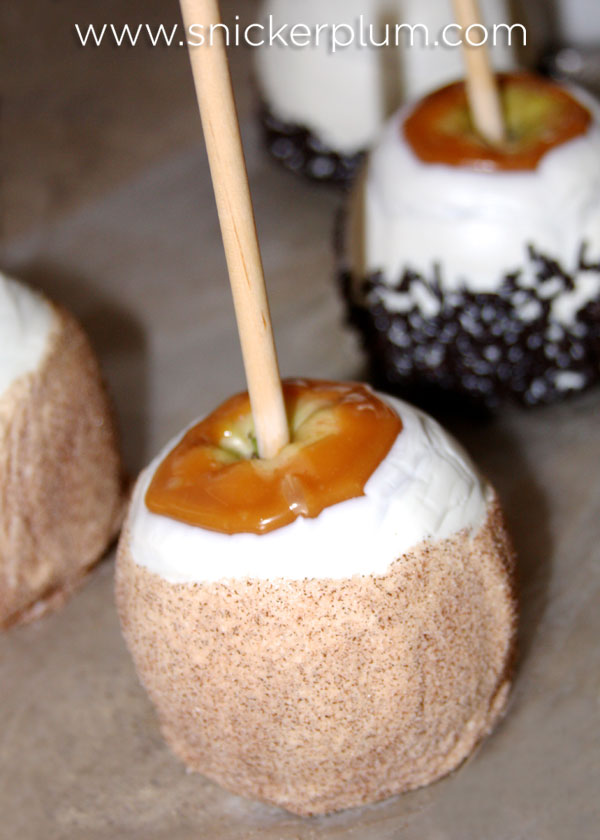
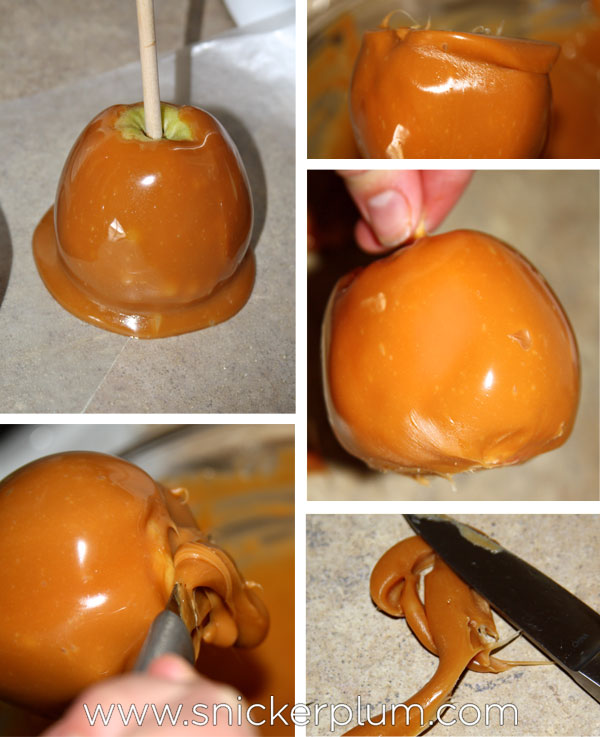
Dip the caramel up to the crown of the apple (just before it starts sloping down to the stick). Then twist the stick in your fingers allowing the caramel to drip off.
*If you try to leave too much caramel on, it will just drip off onto the wax paper anyway, so get as much off as you can*
Remove any of the excess caramel on the bottom, by running it over the rim of your bowl. Then lay it on some wax paper that has been sprayed with non-stick cooking spray.
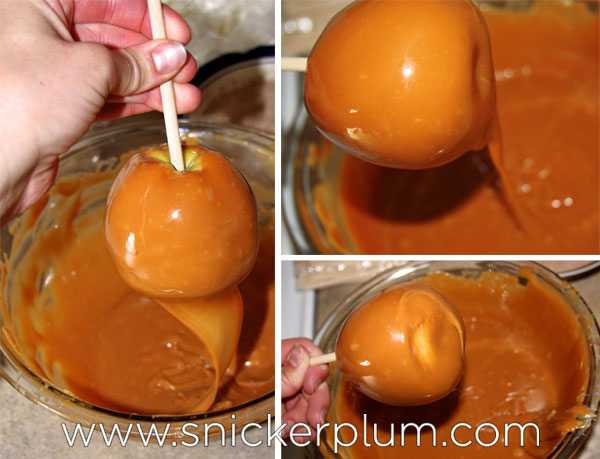
Allow your caramel to cool and set. If there is a pool of caramel at the bottom of the apple, trim before dipping in chocolate and reshape into the apple shape.
*Excess caramel trimmed off can be reused*
Melting Chocolate
Chocolate is much more sensitive than caramel. We also used a pyrex bowl and the microwave for melting our chocolate. I've had nothing but problems with a double boiler.
1. Heat the chocolate on high power, starting with 30 second intervals. It will take approximately 2 minutes (4-30 second intervals) to melt 1-2 lbs of chocolate
2. Stir thoroughly after each 30 second interval
3. If the chocolate is close to the right consistency, DO NOT over heat. Stirring it may finish the melting process, but if necessary to continue heating, reduce the number of seconds. I will usually use 15 to 20 seconds depending on the amount of chocolate that still needs to be melted.
4. Chocolate can be reheated if it becomes set or too thick to work with. However, try to melt only what you need since reheating increases the chances of the buttercream separating.
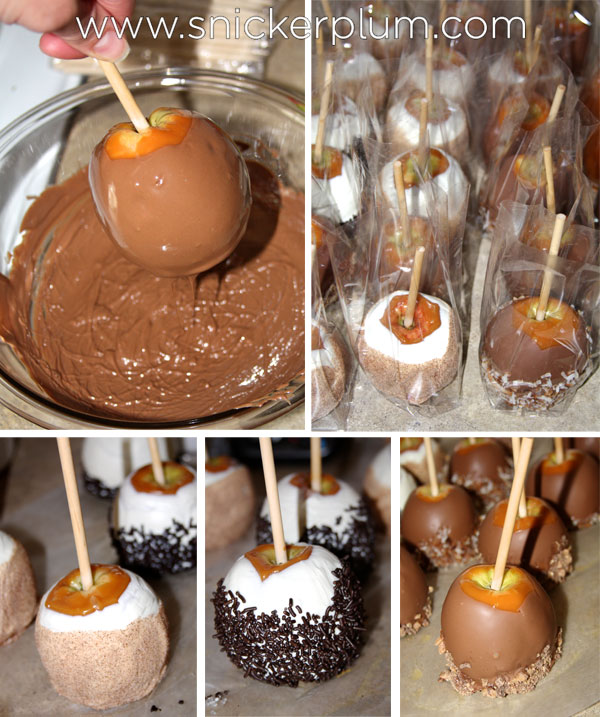
Dip caramel apple in chocolate, spin around in fingers again, getting as much of the chocolate off as possible. Immediately dip bottom of apple in topping to help keep the chocolate in place. You can roll the sides of the chocolate apple in the topping as well, go up as high as you would like, pressing, lifting, & turning until covering the entire apple. (ps. sorry I didn't get a picture of this step. Don't know what happened.)
*Toppings Ideas: Nuts, Sprinkles, Chopped up Candybars, Cinnamon and Sugar, Toasted Coconut, etc...*

**Crisp Apples will keep up to 2-3 weeks if keps in a cool, dry place. If wrapped well they can be refrigerated.**
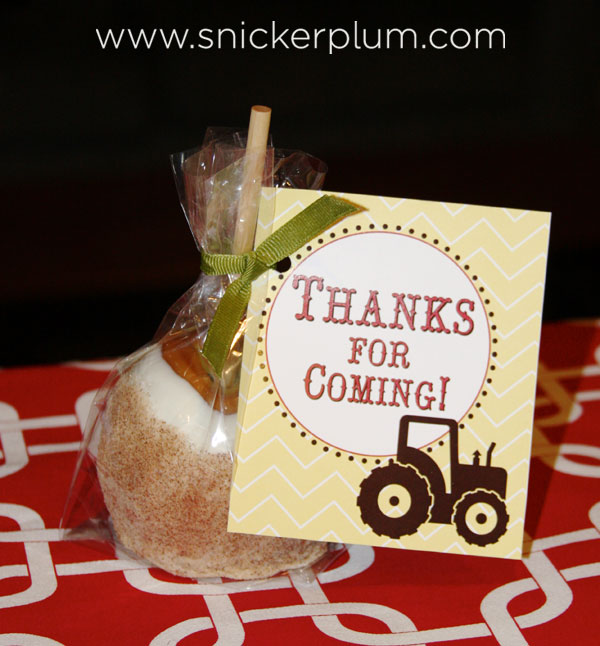
You then can put the apples in cute (clear of course!) cellophane bags to show off your work! Add a cute bow and tag to make the gift personalized as well!
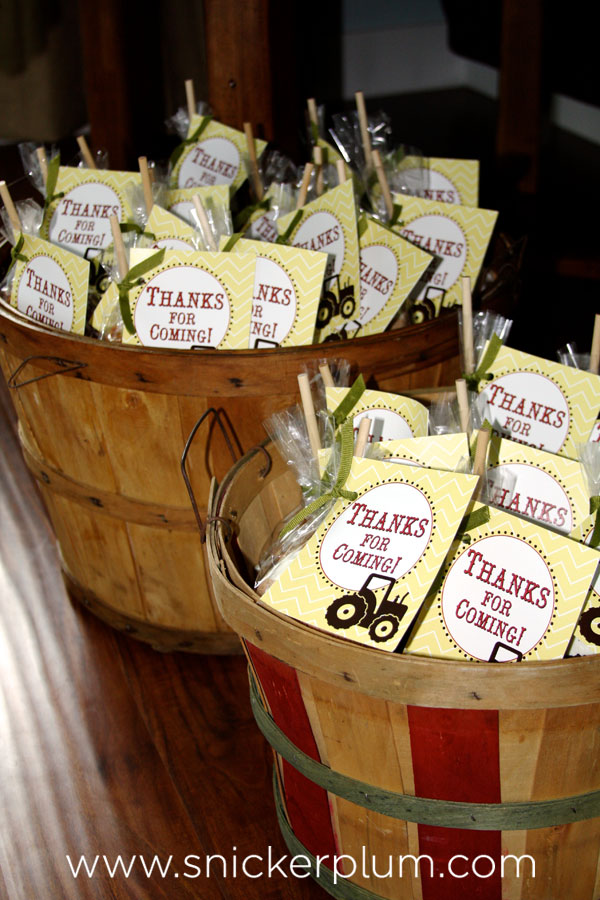
We displayed our Chocolate-Caramel Apple Thank You's in apple bushels! Since we wanted them up top where you could see them, we put upside down bowls and towels in the bottom to fill it up a bit and the gifts sat on top. They turned out so cute! And, doing something personal like this, will really make your guests feel special and appreciated for taking time out of their busy schedules to come support you! Remember the little things go far and mean a lot!

Here are a few more Do's and Don't just in case:)
1. Never add water or other liquid to chocolate. This will cause the chocolate to seize up and you will have a hardened blob that won't be usable.
2. Work in a cool place. In my opinion, the best room temperature to work at is about 68 degrees, but your chocolate will be manageable if your work area is kept in the 70's.
3. Don't chill the apples. You don't want the caramel or chocolate splitting from expansion after warming up. So, leave everything at room temperature from start to finish.
I hope I was able to give you some inspiration for your next big or small celebration! Check back with us on our next DIY and I'll show you how to make the cute cake stand above!